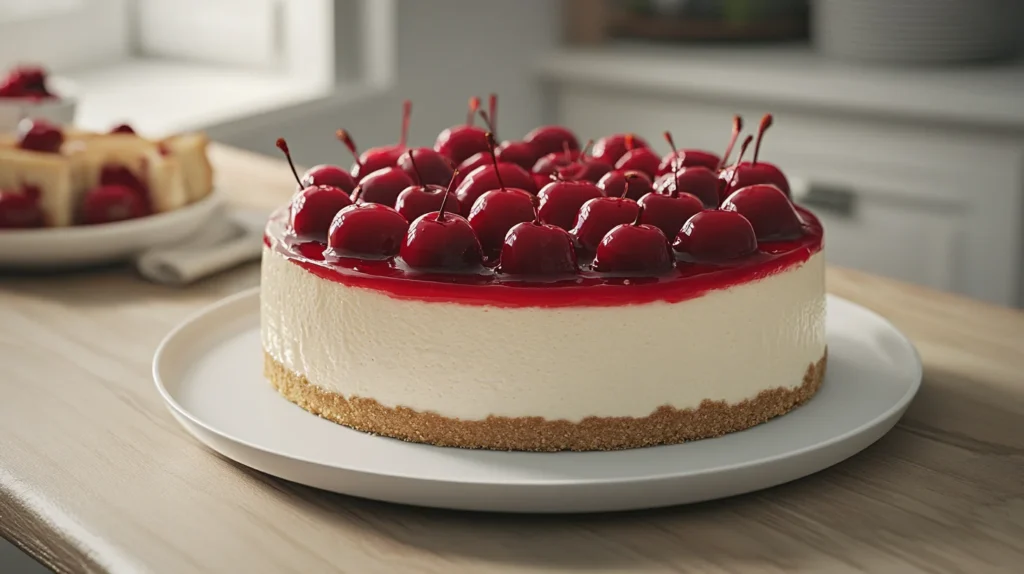
Cherry cheesecake is an irresistible dessert that combines the tangy sweetness of cherries with the creamy richness of cheesecake. This cherry cheesecake recipe has earned its place as a classic favorite worldwide. Whether you prefer it baked or no-bake, this cherry cheesecake recipe is perfect for family gatherings, festive celebrations, or any occasion.
In this guide, you’ll discover every step to mastering the ultimate cherry cheesecake recipe—from selecting the finest ingredients to creating a stunning presentation. You’ll also learn tips for troubleshooting common issues and adapting the recipe for different occasions to make your cherry cheesecake recipe truly stand out.
With this cherry cheesecake recipe, even beginner bakers can confidently create a masterpiece that rivals professional patisseries. Get ready to bring smiles to your loved ones with this delectable treat!

The Ingredients
Making a delicious cherry cheesecake starts with choosing the right ingredients. Each one affects the taste and texture, so it’s important to pick them carefully. Here’s what you’ll need.
Essential Ingredients for a Cherry Cheesecake Recipe
- Crust Ingredients:
- Graham Crackers (or Digestive Biscuits): These serve as the base, providing a buttery and slightly sweet contrast to the creamy filling.
- Unsalted Butter: Melted butter binds the crumbs together, ensuring a firm crust.
- Optional Sugar: A small amount of sugar adds a touch of sweetness to the crust.
- Cheesecake Filling Ingredients:
- Cream Cheese: The star of the cheesecake!
- Granulated Sugar: Sweetens the filling while complementing the tanginess of the cream cheese.
- Sour Cream: Adds tang and creaminess. You can also substitute with Greek yogurt for a lighter option.
- Eggs: Essential for structure and stability in a baked cheesecake. No-bake versions omit eggs.
- Vanilla Extract: Enhances the overall flavor with a subtle, sweet aroma.
- Cherry Topping Ingredients:
- Cherries (Fresh or Canned): Fresh cherries give a more natural flavor, while canned cherries are convenient and consistent.
- Sugar: Sweetens the topping and balances the tartness of the cherries.
- Cornstarch: Thickens the cherry sauce, creating a glossy, luscious topping.
- Lemon Juice: Adds brightness and enhances the cherry flavor.
Tips for Choosing High-Quality Ingredients
- Cream Cheese: Use blocks of cream cheese, not whipped varieties, for the best texture. Ensure it’s at room temperature before mixing to avoid lumps.
- Cherries: If using fresh cherries, select ones that are firm, plump, and deep in color. Frozen cherries can also work, but be sure to thaw and drain them first.
- Butter: Always use unsalted butter for better control over the flavor.
- Eggs: Large eggs are typically used in baking recipes.
Optional Additions for a Unique Twist
- Almond Extract: Adds a nutty aroma that pairs beautifully with cherries.
- Chocolate Crust: Swap out graham crackers for chocolate cookies for a decadent twist.
- Liquor or Wine: Add a splash of cherry liqueur or red wine to the topping for a sophisticated touch.
Preparing the Crust
The crust forms the foundation of your cherry cheesecake, offering a satisfying crunch and a sturdy base for the creamy filling. In this section, we’ll cover everything you need to know about making the perfect crust.

Types of Crust for Cherry Cheesecake
- Classic Graham Cracker Crust:
The most popular choice, graham crackers deliver a slightly sweet, buttery flavor that complements the rich cheesecake filling. - Digestive Biscuit Crust:
Common in European recipes, digestive biscuits offer a maltier flavor and are an excellent alternative to graham crackers. - Chocolate Cookie Crust:
For chocolate lovers, crushed chocolate cookies like Oreos create a decadent base. - Nut-Based Crust:
Ground almonds, pecans, or walnuts can be used to make a gluten-free crust with a unique nutty flavor.
Step-by-Step Guide to a Perfect Cheesecake Crust
Ingredients for a Graham Cracker Crust:
- 1 ½ cups of graham cracker crumbs (about 10–12 crackers)
- ⅓ cup of unsalted butter, melted
- 2 tablespoons of granulated sugar (optional)
Directions:
- Crushing the Crackers:
- Place graham crackers in a zip-top bag and crush them into fine crumbs using a rolling pin. Alternatively, use a food processor for a quicker method.
- Mixing the Ingredients:
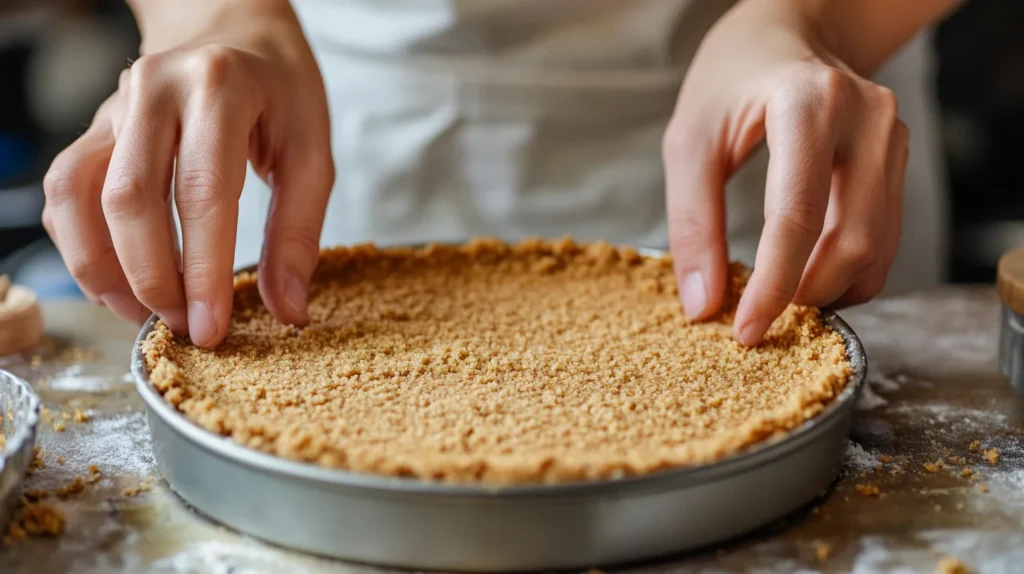
- In a medium bowl, combine the graham cracker crumbs, melted butter, and sugar (if using). Stir until the mixture resembles damp sand.
- Pressing into the Pan:
- Use the bottom of a measuring cup or a flat glass to press the mixture firmly and evenly across the base and slightly up the sides.
- Pre-Baking the Crust (Optional):
- Pre-baking helps set the crust and prevents it from becoming soggy when the filling is added. Let it cool completely before adding the cheesecake mixture.
Tips for a Foolproof Crust
- Even Thickness:
Ensure the crust is pressed evenly to avoid thin spots that can crumble under the weight of the filling. - Chilling:
If you’re making a no-bake cheesecake, refrigerate the crust for at least 30 minutes to firm it up before adding the filling. - Customizing Flavors:
Add a pinch of cinnamon or a teaspoon of cocoa powder to the crumbs for added flavor.
Making the Cheesecake Filling
The filling is the heart of a cherry cheesecake, offering the creamy and indulgent texture that defines this classic dessert. Achieving a smooth, velvety consistency requires attention to detail and the right technique.
Ingredients for the Cheesecake Filling
- 24 ounces (3 blocks) of cream cheese, softened
- 1 cup granulated sugar
- 1 cup sour cream
- 3 large eggs
- 1 teaspoon vanilla extract
- 1 tablespoon all-purpose flour (optional, for added structure)
Step-by-Step Instructions for the Cheesecake Filling
Preparing the Cream Cheese
- Allow the cream cheese to sit at room temperature for at least 30 minutes. This step ensures it softens, making it easier to mix without forming lumps.
Mixing the Sugar and Cream Cheese
- In a large mixing bowl, beat the cream cheese and sugar together using an electric mixer. Start at low speed to avoid splattering, then increase to medium speed until the mixture is smooth and creamy. Avoid overmixing, as this can incorporate too much air, which might cause cracks during baking.
Adding Sour Cream and Vanilla
- Stir in the sour cream and vanilla extract. These ingredients enhance the flavor and give the cheesecake its signature tanginess.
Incorporating the Eggs
- Overmixing at this stage can lead to a dense texture or cracks.
Optional Flour or Cornstarch
- If you prefer a firmer texture, add 1 tablespoon of all-purpose flour or cornstarch to the mixture and mix gently until combined.
Tips for Achieving a Perfect Cheesecake Filling
- Use Room-Temperature Ingredients:
- Cold cream cheese or eggs can result in a lumpy filling.
- Scrape Down the Bowl:
- As you mix, frequently scrape down the sides and bottom of the bowl with a spatula to ensure all ingredients are evenly combined.
- Avoid Overmixing:
- Overmixing can cause the cheesecake to rise excessively during baking and then deflate, leading to cracks. Mix just until the ingredients are blended.
- Taste Before Adding Eggs:
- Once the eggs are added, tasting the mixture isn’t recommended due to raw egg content. Taste the filling before adding the eggs to adjust the sweetness or flavor if needed.
Alternatives for Special Diets
- Lighter Cheesecake: Replace some or all of the cream cheese with low-fat cream cheese or use Greek yogurt in place of sour cream.
- Dairy-Free Version: Use dairy-free cream cheese and coconut yogurt as substitutes for the cream cheese and sour cream.
Adding the Cherry Topping
The cherry topping is the crowning glory of a cherry cheesecake, providing a pop of color, sweetness, and tang that perfectly complements the creamy filling. Whether you use fresh cherries or a convenient canned option, this step elevates your cheesecake from delicious to unforgettable.

Ingredients for the Cherry Topping
- 2 cups fresh or frozen cherries (pitted)
- ½ cup granulated sugar
- 2 tablespoons cornstarch
- 2 tablespoons water (for mixing the cornstarch)
- 1 tablespoon lemon juice (optional, for added brightness)
- ½ teaspoon vanilla extract or almond extract (optional)
Preparing the Cherry Topping
Combine Cherries and Sugar
- In a medium saucepan, combine the cherries and sugar. Stir to coat the cherries evenly. Let the mixture sit for 5 minutes to allow the cherries to release some of their juices.
Cook the Mixture
- Place the saucepan over medium heat. Cook the cherries, stirring occasionally, until they begin to soften and release more liquid (about 5–7 minutes).
Thicken the Sauce
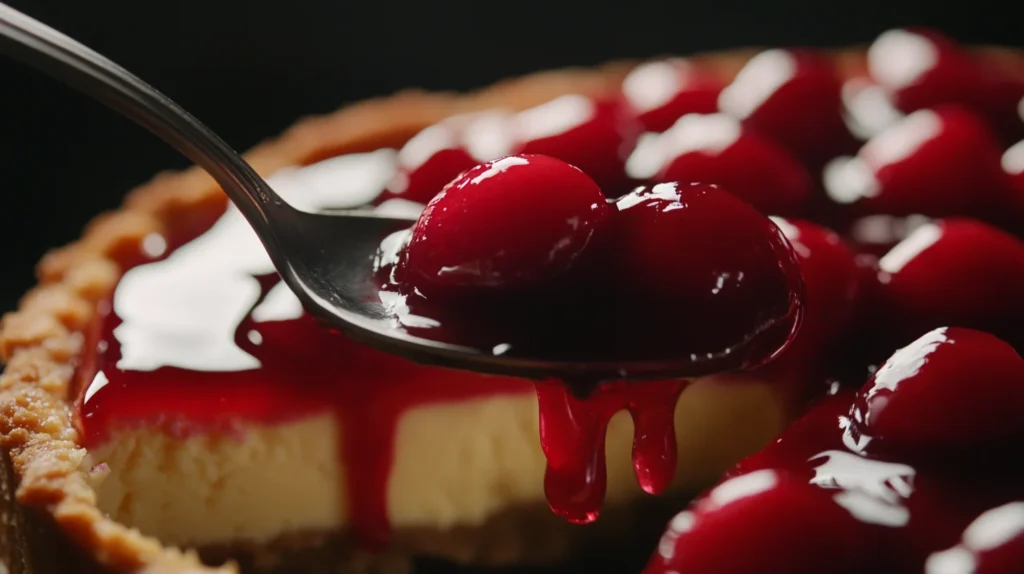
- In a small bowl, mix the cornstarch and water to form a smooth slurry. Gradually add this slurry to the cherry mixture, stirring constantly. The sauce will thicken within 1–2 minutes.
Add Flavor Enhancements
- Stir in the lemon juice and vanilla or almond extract. These optional additions enhance the flavor of the cherries and balance the sweetness.
Cool the Topping
- Remove the saucepan from heat and let the cherry topping cool to room temperature. It will thicken further as it cools.
Tips for the Best Cherry Topping
- Consistency Matters:
- If the topping is too thick, add a tablespoon of water at a time until the desired consistency is achieved. If it’s too thin, cook for a few more minutes.
- Taste Test:
- Adjust the sweetness by adding more sugar or a bit more lemon juice for tartness.
- Using Canned Cherries:
- If using canned cherry pie filling, enhance it by adding a splash of lemon juice and a pinch of cinnamon or vanilla extract to elevate the flavor.
- Make Ahead:
- The cherry topping can be made a day or two in advance and stored in the refrigerator. Let it come to room temperature before using it on the cheesecake.
Variations for the Topping
- Mixed Berry Topping: Combine cherries with blueberries, raspberries, or strawberries for a mixed fruit topping.
- Chocolate Cherry Sauce: Stir in a tablespoon of cocoa powder or melted chocolate for a richer flavor.
- Spiced Cherry Topping: Add a pinch of cinnamon or nutmeg for a warm, spiced variation.
Assembling the Cheesecake
Now that you have made the crust, cheesecake filling, and cherry topping, it’s time to put everything together into a beautiful dessert. Whether you choose to bake it or make a no-bake version, layering and cooling it the right way are key to great results.
Steps to Assemble the Cheesecake
Pour the Filling into the Crust
- After the crust has cooled (if pre-baked), pour the prepared cheesecake filling into the springform pan. Use a spatula to spread the filling evenly and smooth the top.
Baking the Cheesecake
- Preheat your oven to 325°F (163°C). Bake for 50–60 minutes, or until the edges are set, but the center still jiggles slightly when shaken.
- Turn off the oven and leave the cheesecake inside This gradual cooling helps prevent cracks.
Cooling the Cheesecake
- Remove the cheesecake. Once cooled, cover it with plastic wrap or aluminum foil and refrigerate for at least 4–6 hours, preferably overnight.
Adding the Cherry Topping
- Once the cheesecake has fully chilled, spoon the prepared cherry topping over the surface, spreading it evenly. For a decorative effect, leave a small border of the creamy filling visible around the edges.
Tips for a Flawless Assembly
- Preventing a Soggy Crust:
- If baking the crust, wrap the bottom of the springform pan with aluminum foil to protect it from any water if you’re using a water bath.
- Using a Water Bath (Optional):
- Place the springform pan inside a larger roasting pan and fill the roasting pan with hot water until it reaches halfway up the sides of the cheesecake pan. This method ensures even baking and prevents cracks.
- Avoid Overloading the Topping:
- Add just enough cherry topping to cover the cheesecake without overwhelming the creamy filling. Serve extra topping on the side for guests who want more.
- Chilling for Best Results:
- Don’t rush the cooling process. A well-chilled cheesecake holds its shape better and tastes even more delicious.
No-Bake Cheesecake Assembly
- If you’re making a no-bake version, skip the baking steps and refrigerate the cheesecake filling in the crust for 6–8 hours or until firm. Add the cherry topping just before serving.
Finishing Touches and Garnishes
- Whipped Cream: Pipe swirls of whipped cream around the edges for an elegant touch.
- Chocolate Shavings: Sprinkle chocolate curls or shavings for added flair.
- Mint Leaves: Add a fresh pop of green with a few mint leaves.
- Powdered Sugar Dusting: Lightly dust the edges of the cheesecake for a delicate finish.
Pairings & Serving Suggestions
This cheesecake pairs beautifully with Neapolitan Ice Cream – A Classic Trio of Flavors or a crunchy side treat like Chocolate Chip Cookie Bars – Easy & Delicious Recipe.
For more fruity dessert ideas, check out our Strawberry Crunch Cake Recipe – A Moist & Crunchy Delight – another must-try treat!
Enjoy your delicious homemade cherry cheesecake! 🍒🍰
Frequently Asked Questions (FAQs)
Here are some common questions about making cherry cheesecake, along with detailed answers to ensure your dessert turns out perfectly every time.
What is the difference between New York cheesecake and classic cheesecake?
New York cheesecake is known for its dense, creamy, and rich texture. The main differences lie in the ingredients and preparation:
- New York Cheesecake:
- Typically includes a large amount of cream cheese, heavy cream, or sour cream to create a rich and creamy texture.
- Often uses extra egg yolks for added richness.
- It is usually baked at a high temperature initially and then reduced to low, giving it a unique consistency.
- Classic Cheesecake:
- May be lighter and less dense compared to New York-style cheesecake.
- Often made with a more balanced ratio of cream cheese to other ingredients like eggs and cream.
- The flavor is subtler and less tangy, appealing to those who prefer a milder dessert.
What are the three types of cheesecake?
Cheesecakes come in several styles, but the three most popular types are:
- New York Cheesecake:
- Rich, dense, and creamy, with heavy cream or sour cream as a key ingredient.
- No-Bake Cheesecake:
- A lighter version made without eggs and baking, set in the refrigerator using gelatin or whipped cream.
- Japanese Cheesecake:
- Fluffy and soufflé-like, with a light, airy texture achieved by folding whipped egg whites into the batter.
What does adding an extra egg to cheesecake do?
Adding an extra egg to cheesecake enhances its structure and stability. Here’s what it does:
- Increased Creaminess: The extra egg contributes more fat, making the cheesecake richer and creamier.
- Improved Set: The proteins in eggs help the cheesecake set more firmly.
- Risk of Over-Firmness: Too many eggs can make the cheesecake texture overly firm or custard-like, so balance is key.
Is sour cream or whipping cream better for cheesecake?
Both sour cream and whipping cream serve different purposes in cheesecake, and the choice depends on the desired texture and flavor:
- Sour Cream:
- Adds tanginess and a slightly tart flavor, balancing the sweetness of the cheesecake.
- Creates a denser and creamier texture.
- Commonly used in New York-style cheesecakes.
- Whipping Cream:
- Adds richness and lightens the texture, making the cheesecake fluffier.
- Enhances the overall creaminess without altering the flavor.
- Better for recipes aiming for a lighter or no-bake cheesecake.
Both are excellent choices, but sour cream is preferred for traditional cheesecakes with a rich and tangy profile, while whipping cream is ideal for lighter variations.
Conclusion
Cherry cheesecake is more than just a dessert—it’s a delightful experience that combines rich, creamy textures with the bright, tangy sweetness of cherries. This cherry cheesecake recipe is perfect for anyone who loves the combination of smooth cheesecake filling and vibrant cherry topping.
Whether you’re baking a classic version or opting for a no-bake alternative, this cherry cheesecake recipe equips you with all the tools, tips, and techniques to create a flawless dessert every time. From mastering the crust to perfecting the filling, every step contributes to making this cherry cheesecake unforgettable.
By carefully selecting quality ingredients, mastering the art of the crust, achieving a silky filling, and topping it with a vibrant cherry sauce, you can produce a dessert that will impress family, friends, and guests alike. With this cherry cheesecake recipe, even beginners can achieve professional-level results.
Now that you’ve learned how to make cherry cheesecake, it’s time to put your skills to the test. Whether it’s for a special occasion or a simple treat for yourself, this recipe is sure to bring smiles and make memories. Happy baking with this delicious cherry cheesecake recipe!

🍒 Cherry Cheesecake Recipe
Equipment
- 9-inch springform pan
- Mixing bowls
- Electric mixer or stand mixer
- Measuring cups and spoons
- Rubber spatula
- Food processor (optional, for crust)
- Baking sheet
- Cooling rack
Ingredients
- For the Graham Cracker Crust:
- 1 ½ cups 180g graham cracker crumbs
- ⅓ cup 70g granulated sugar
- ½ cup 113g unsalted butter, melted
- For the Cheesecake Filling:
- 2 8oz packages (450g total) cream cheese, softened
- ¾ cup 150g granulated sugar
- 2 large eggs
- 1 teaspoon vanilla extract
- ½ cup 120ml sour cream
- For the Cherry Topping:
- 1 ½ cups 360g cherry pie filling OR
- 2 cups 300g fresh cherries, pitted
- ½ cup 100g granulated sugar
- 1 tablespoon cornstarch
- ¼ cup 60ml water
- ½ teaspoon lemon juice
Instructions
- Step 1: Prepare the Graham Cracker Crust
- Preheat the oven to 325°F (163°C). Grease a 9-inch springform pan.
- In a mixing bowl, combine graham cracker crumbs, sugar, and melted butter. Mix until the crumbs are evenly coated.
- Press the mixture firmly into the bottom of the pan. Use the back of a spoon or a measuring cup to create an even crust.
- Bake for 10 minutes, then remove from the oven and let it cool.
- Step 2: Make the Cheesecake Filling
- In a large mixing bowl, beat cream cheese and sugar until smooth and creamy.
- Add eggs one at a time, beating after each addition.
- Mix in vanilla extract and sour cream, and blend until smooth.
- Pour the filling over the cooled crust, spreading it evenly.
- Step 3: Bake the Cheesecake
- Place the springform pan on a baking sheet and bake at 325°F (163°C) for 45-50 minutes, or until the edges are set and the center is slightly jiggly.
- Turn off the oven and crack the oven door slightly. Let the cheesecake cool inside the oven for 1 hour (this prevents cracking).
- Step 4: Make the Cherry Topping
- If using fresh cherries, in a saucepan, combine cherries, sugar, cornstarch, water, and lemon juice. Cook over medium heat until thickened (about 5-7 minutes). Let cool.
- Step 5: Assemble and Chill
- Once the cheesecake has cooled to room temperature, refrigerate for at least 4 hours (preferably overnight).
- Before serving, spread the cherry topping evenly over the cheesecake.
- Step 6: Serve and Enjoy!
- Slice and serve chilled. Enjoy your delicious homemade Cherry Cheesecake!
Notes
No Cracks: To prevent cracks, bake the cheesecake with a water bath (place the pan inside a larger pan filled with hot water).
Storage: Store leftover cheesecake in the refrigerator for up to 5 days.
Freezing: Wrap individual slices in plastic wrap and freeze for up to 2 months.

