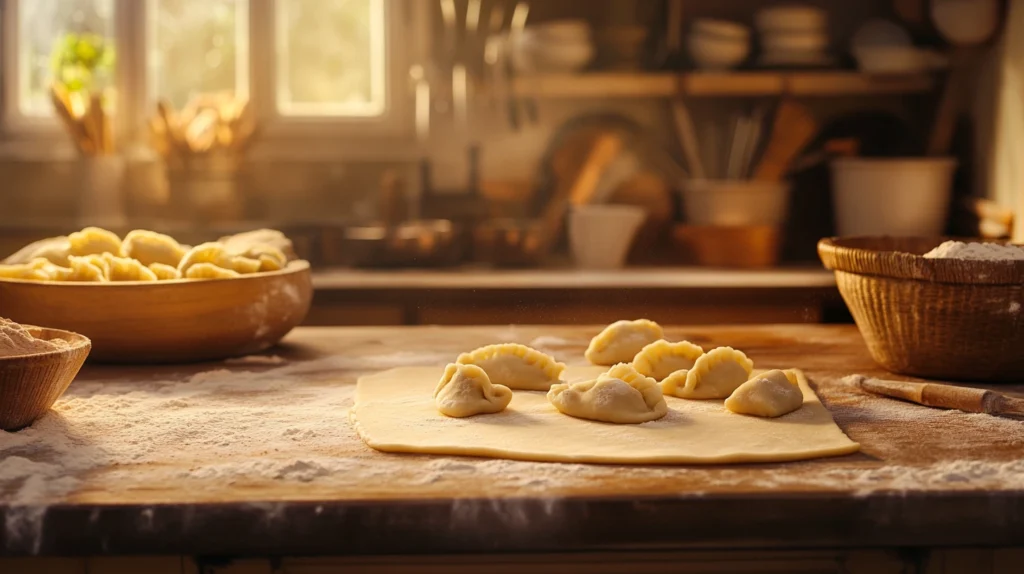
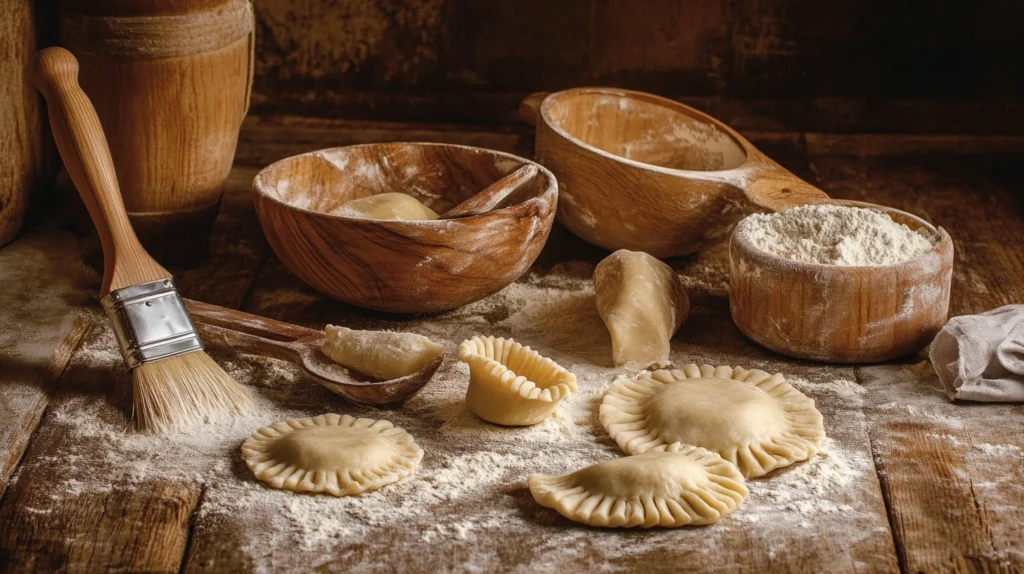
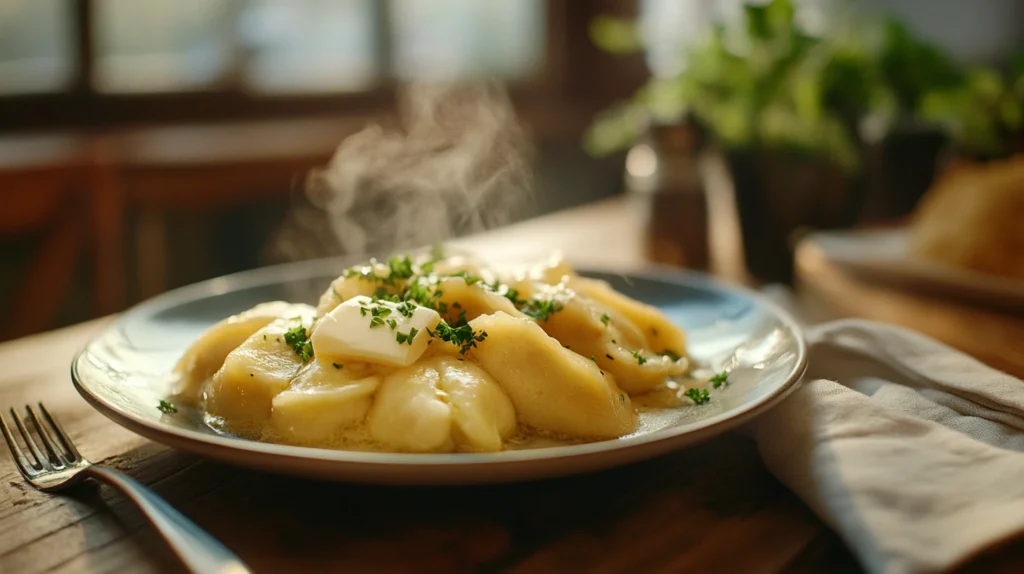
Pierogi, a beloved Eastern European comfort food, have gained worldwide acclaim for their versatility and deliciousness. These soft, pillowy dumplings are traditionally filled with a variety of ingredients, ranging from creamy mashed potatoes to savory meats or sweet fruits. While the fillings are undoubtedly important, the true secret to exceptional pierogi lies in the dough. A well-made pierogi dough is tender, pliable, and durable enough to hold the filling without tearing, making it the foundation of every perfect pierogi.
In this article, we’ll take you through a foolproof pierogi dough recipe that guarantees success every time. By mastering this simple process, you’ll unlock the secret to making soft, elastic dough that complements a wide variety of fillings. Whether you’re a seasoned chef or trying your hand at making pierogi for the first time, this pierogi dough recipe will help you achieve perfect results.
Stay tuned as we dive into the cultural roots of pierogi, discuss essential ingredients, and share a step-by-step pierogi dough recipe that will impress your family and friends.

What Are Pierogi and Why Is a Good Pierogi Dough Recipe Important?
Pierogi are a staple of Eastern European cuisine, particularly popular in Poland, Ukraine, and Slovakia, though they have gained fans worldwide. These iconic dumplings start with a high-quality pierogi dough recipe, which is soft, pliable, and perfect for wrapping around a variety of savory or sweet fillings. Whether you choose to boil, steam, or fry them, mastering a foolproof pierogi dough recipe is essential to creating delicious, homemade pierogi.
Each country and region has its variations, but the foundation of pierogi remains the same—a hearty, satisfying dish. This guide will walk you through the best pierogi dough recipe, ensuring your dumplings are as authentic and flavorful as those made in traditional Eastern European kitchens.
History and Cultural Significance of Pierogi
Pierogi trace their origins back to the Middle Ages, with some theories suggesting they were inspired by Asian dumplings brought to Europe via trade routes. Over time, they evolved to suit local ingredients and tastes, becoming a cultural emblem in many countries. In Poland, pierogi are so cherished that they have dedicated festivals and holidays celebrating their importance.
These dumplings were traditionally made during special occasions like weddings, Christmas, or Easter, often filled with ingredients symbolic of abundance and prosperity, such as cheese, potatoes, or mushrooms. Today, they remain a symbol of home cooking, nostalgia, and comfort.
Common Variations of Pierogi Dough and Fillings
Pierogi dough is a simple, versatile mixture typically made with flour, eggs, and water or milk. Variations include:
- Classic Dough: Made with all-purpose flour, eggs, water, and a pinch of salt, this dough is pliable yet sturdy.
- Vegan Dough: Substituting eggs with oil or plant-based alternatives makes the dough suitable for vegan diets.
- Gluten-Free Dough: Using rice flour or other gluten-free blends ensures accessibility for those with dietary restrictions.
Fillings are equally diverse, ranging from:
- Savory Fillings: Mashed potatoes with cheese, sauerkraut, mushrooms, ground meat, or spinach.
- Sweet Fillings: Fresh fruits like blueberries, cherries, or apples, often paired with sugar or cinnamon.
Why Mastering the Dough Is Crucial
No matter how flavorful the filling is, poorly made dough can ruin the pierogi experience. Overly tough dough makes the dumplings difficult to eat, while overly soft dough can tear during cooking. A well-balanced dough should be elastic enough to stretch thinly without breaking, tender after cooking, and flavorful enough to complement the filling. Mastering the dough sets the foundation for consistently excellent pierogi, turning this age-old dish into a work of art.
Ingredients for the Best Pierogi Dough Recipe
A well-crafted pierogi dough relies on simple, wholesome ingredients that work harmoniously to create a smooth, pliable texture. Choosing the right ingredients and understanding their role in the dough is the first step to mastering this recipe.
Essential Ingredients for a Classic Pierogi Dough Recipe
Here’s what you’ll need to make traditional pierogi dough:
- All-Purpose Flour
- The foundation of the dough, providing structure and elasticity. Opt for unbleached, high-quality all-purpose flour for the best results.
- Substitute with bread flour for a chewier texture, though this is less common for pierogi.
- Eggs
- Eggs add richness, color, and elasticity to the dough, making it easier to roll and shape. If you prefer a firmer dough, add an extra egg yolk.
- Water
- Lukewarm water helps bind the ingredients and creates a soft, workable dough. The temperature is key—too hot and it may cook the egg, too cold and the dough may become tough.
- Salt
- Just a pinch of salt enhances the flavor of the dough, preventing it from tasting bland.
- Butter or Oil (Optional)
- Some recipes call for melted butter or oil to add tenderness and richness. This is optional but recommended for softer dough, especially if you plan to fry the pierogi.
Alternative Ingredients for Dietary Needs
Accommodating specific dietary preferences is easy with a few substitutions:
- Gluten-Free Dough
- Replace all-purpose flour with a gluten-free flour blend that includes xanthan gum for elasticity. Rice flour, tapioca starch, or almond flour combinations work well.
- Vegan Dough
- Omit eggs and replace with vegetable oil or a flaxseed-and-water mixture. Coconut milk or almond milk can also be used instead of water for added richness.
- Whole Wheat Flour
- Keep in mind that this will result in a denser dough.
Ingredient Selection Tips for Best Results
- Flour: Always sift your flour to avoid lumps and ensure a smooth dough. If possible, use a scale to measure for precision.
- Eggs: Use room-temperature eggs for better incorporation into the dough.
- Water: Gradually add water to avoid making the dough too sticky or too dry. Adjust based on humidity and flour type.
- Butter or Oil: If using butter, opt for unsalted and melt it before adding to the dough for even distribution.
Mastering the selection and balance of these ingredients ensures that your pierogi dough will have the perfect texture and flavor, setting the stage for the filling and cooking process.
Tools You’ll Need to Perfect Your Pierogi Dough Recipe
Making pierogi dough from scratch requires only a few basic tools, most of which you likely already have in your kitchen. However, using the right tools can make the process smoother, more efficient, and enjoyable.

Essential Tools for Kneading and Rolling Dough
- Mixing Bowl
- A large, sturdy bowl is necessary for combining and kneading the dough. It should be spacious enough to allow thorough mixing without spilling flour.
- Wooden Spoon or Silicone Spatula
- For the initial mixing of ingredients before kneading, these tools help combine the elements effectively.
- Rolling Pin
- A rolling pin is indispensable for flattening the dough evenly. Wooden rolling pins are traditional, but silicone or marble pins work just as well.
- Sharp Knife or Dough Cutter
- For portioning the dough into manageable pieces and cutting out pierogi shapes if you’re not using a cutter.
- Pierogi Cutter or Round Cookie Cutter
- These tools ensure consistently sized rounds of dough for filling and shaping pierogi. Use a 3-4 inch cutter for standard pierogi.
- Kitchen Towel
- A clean, slightly damp kitchen towel is useful for covering the dough while it rests to prevent it from drying out.
Optional Tools for Convenience
- Stand Mixer with Dough Hook
- Ideal for those who prefer not to knead the dough by hand. A stand mixer simplifies the process, especially for larger batches.
- Pastry Mat or Non-Stick Surface
- Provides a clean, flat surface for rolling out dough while preventing sticking. Silicone mats with measurements are particularly handy for consistent thickness.
- Pierogi Mold or Press
- A mold or press can streamline the filling and sealing process, ensuring uniform results, especially for beginners.
- Pastry Brush
- Useful for brushing off excess flour from the dough or adding a light coat of water to help seal the edges of the pierogi.
Tips on Choosing the Right Tools
- Size Matters: Use appropriately sized tools, especially for cutting and rolling, to maintain consistency in your pierogi.
- Ease of Cleaning: Opt for tools that are easy to clean and maintain, such as non-stick rolling pins or dishwasher-safe cutters.
- Durability: Invest in high-quality tools that can withstand regular use, particularly if you plan to make pierogi often.
Equipped with these tools, you’ll be ready to tackle every step of the pierogi dough-making process, from mixing to rolling and shaping with confidence and ease.
Step-by-Step Pierogi Dough Recipe Instructions
Making pierogi dough is a straightforward process when you follow the steps carefully. Each stage plays an important role in creating dough that is smooth, elastic, and easy to work with. Below is a detailed, step-by-step guide to help you achieve perfect pierogi dough.

Preparing the Ingredients
- Gather all your ingredients:
- 2 ½ cups of all-purpose flour
- 1 large egg
- ½ teaspoon of salt
- ½ cup of lukewarm water
- Optional: 1 tablespoon of melted butter or vegetable oil for added tenderness.
- Ensure your ingredients are at room temperature. This promotes better incorporation and helps prevent a tough dough.
Mixing the Dough
- Combine the Dry Ingredients
- In a large mixing bowl, sift the flour and salt together. This removes lumps and ensures even distribution of the salt.
- Add the Wet Ingredients
- Crack the egg into the well and begin mixing with a fork, gradually incorporating the flour.
- Add Water Gradually
- Slowly pour in the lukewarm water while continuing to mix. If using melted butter or oil, add it at this stage. The mixture should start coming together as a shaggy dough.
Kneading the Dough
- Transfer the dough to a lightly floured surface.
- Knead by pressing the dough with the heel of your hand, folding it over itself, and rotating slightly. Repeat for about 8–10 minutes.
- The dough should become smooth, elastic, and only slightly sticky. If it feels too dry, add a few drops of water; if it’s too wet, sprinkle in a bit more flour.
Resting the Dough
- Shape the kneaded dough into a ball and place it back in the bowl.
- Rest it for 30 minutes. Resting allows the gluten to relax, making the dough easier to roll out and work with.
Rolling Out the Dough
- After resting, divide the dough into 2–3 smaller portions for easier handling.
- On a floured surface, use a rolling pin to roll out one portion of dough to about 1/8-inch thickness. Rotate the dough frequently and dust lightly with flour to prevent sticking.
Cutting the Dough
- Use a round cookie cutter, pierogi cutter, or a glass with a 3–4 inch diameter to cut out circles from the rolled-out dough.
- Gather the scraps, knead them briefly, and roll them out again to cut additional circles.
Storing Unused Dough
- If you’re not using the dough immediately, wrap it tightly in plastic wrap and store it in the refrigerator for up to 24 hours.
- For longer storage, freeze the dough for up to 3 months. Thaw in the refrigerator before using.
Pro Tip: Testing the Dough
Before cutting all the dough, cook one piece to test its texture. If it’s too tough, you can knead in a teaspoon of water. If it’s too soft, knead in a pinch of flour.
With these instructions, you’ll have a batch of perfectly rolled and cut dough ready to fill with your favorite ingredients.
Expert Tips for a Flawless Pierogi Dough Recipe
Making pierogi dough is as much an art as it is a science. While the ingredients are simple, mastering the technique requires attention to detail and a few insider tips. Below are expert recommendations to ensure your pierogi dough turns out perfectly every time.
Achieving the Ideal Dough Consistency
- Balance Moisture and Elasticity
- If it clings excessively to your hands or surface, sprinkle a small amount of flour while kneading.
- Conversely, if the dough feels dry or cracks while rolling, knead in a teaspoon of lukewarm water.
- Use Lukewarm Water
- Lukewarm water helps bind the ingredients smoothly and ensures a softer dough. Avoid cold water, as it can make the dough tougher to work with.
- Rest the Dough
- Rest the dough for 30 minutes. This step relaxes the gluten, making the dough more pliable and easier to roll out thinly without tearing.
Common Mistakes to Avoid
- Over-Kneading the Dough
- Over-kneading can result in a tough, chewy texture.
- Skipping the Resting Step
- Rushing the process by skipping the resting period often leads to dough that’s difficult to roll out and shape.
- Using Too Much Flour While Rolling
- While a floured surface is necessary, excess flour can dry out the dough. Dust lightly and sparingly.
- Rolling the Dough Too Thin or Too Thick
- Aim for a thickness of about 1/8 inch. Dough that is too thin may tear when filled, while overly thick dough can overpower the filling.
Adjusting Dough Texture for Different Fillings
- For Savory Fillings:
- Use slightly firmer dough to better support heavier fillings like potatoes, meat, or cheese.
- For Sweet Fillings:
- A softer, slightly enriched dough (e.g., with a tablespoon of butter) pairs better with delicate fruit fillings and enhances their flavor.
- For Fried Pierogi:
- Add a tablespoon of oil or melted butter to the dough for a crisper texture after frying.
Enhancing Dough Flavor
- Add Sour Cream or Yogurt:
- Incorporate a tablespoon of sour cream or plain yogurt for a subtle tang and extra tenderness.
- Experiment with Herbs and Spices:
- For savory pierogi, mix finely chopped fresh herbs like parsley or dill directly into the dough for added flavor.
Rolling and Cutting Like a Pro
- Roll out one portion of dough at a time to prevent the rest from drying out. Keep unused dough covered with a damp towel.
- Ensure even thickness to avoid uneven cooking. Use a pastry mat with measurements for precision.
- For faster work, use a pasta machine to roll the dough evenly.
Sealing Pierogi Properly
- Moisten the edges of the dough circles lightly with water to create a tight seal.
- Press the edges firmly with your fingers or crimp them with a fork for added security and a decorative finish.
By following these expert tips, you can consistently create pierogi dough that is tender, pliable, and easy to work with, ensuring your pierogi look and taste amazing.
More Recipe Inspiration
If you’re looking for other culinary adventures, try these complementary dishes:
- Sourdough pizza crust for a tangy twist on homemade pizza nights.
- Add a sweet note to your meal with sourdough cinnamon rolls – the perfect dessert to follow a hearty pierogi dinner.
- For a flavorful side, explore the broccoli and cauliflower salad.
FAQs About Pierogi Dough Recipes
Is pierogi dough the same as pasta dough?
Pierogi dough and pasta dough share similarities but have key differences:
- Pierogi Dough: Typically softer and more tender, it is made with all-purpose flour, eggs, water, and sometimes butter or sour cream. It’s designed to be pliable for rolling and sealing, and its texture remains softer after cooking.
- Pasta Dough: Firmer and more elastic, it is usually made with semolina or durum wheat flour and eggs (sometimes water). This creates a sturdier dough that holds its shape for boiling or drying. While they are not identical, pasta dough can be adapted for pierogi in a pinch by adjusting its moisture content for better pliability.
What is the best flour to use for pierogies?
The best flour for pierogi dough is:
- All-Purpose Flour: It strikes a balance between structure and softness, making it the most commonly used flour for pierogi.
- Pastry Flour: Ideal for softer, more delicate pierogi.
- Gluten-Free Flour: Use a gluten-free blend with xanthan gum if you’re accommodating dietary restrictions. Ensure the blend has good elasticity for rolling and sealing.
Pro Tip: Always sift your flour before measuring to ensure a smooth, lump-free dough.
Is pierogi dough the same as dumpling dough?
Pierogi dough and dumpling dough are similar but differ based on regional styles and cooking methods:
- Pierogi Dough: Soft, slightly elastic, and designed for boiling, steaming, or frying. It’s traditionally enriched with eggs and sometimes butter for tenderness.
- Dumpling Dough: Varies greatly depending on the type (e.g., Chinese dumplings, ravioli, or gyoza). For example:
- Chinese Dumplings: Use water-based dough that’s thinner and more elastic.
- Ravioli: Similar to pasta dough with a firmer, drier texture.
While you can interchange these doughs in some recipes, each has characteristics suited to its traditional use.
Why is my pierogi dough so tough?
Tough pierogi dough can result from several issues:
- Over-Kneading: Kneading the dough too much develops excessive gluten, leading to a dense and chewy texture.
- Insufficient Moisture: If the dough is too dry, it becomes difficult to roll and shape. Gradually add lukewarm water while kneading to fix this.
- Skipping the Resting Step: Without resting, the gluten in the dough doesn’t relax, making it hard to roll out and work with.
- Too Much Flour: Over-flouring the dough or surface during rolling can dry out the dough.
Solution: Allow the dough to rest for at least 30 minutes, adjust hydration levels as needed, and avoid overworking it. This will result in a softer, more pliable dough.
Conclusion
Making a pierogi dough recipe from scratch is a rewarding culinary endeavor that brings the comfort and joy of Eastern European tradition to your kitchen. With simple ingredients, the right tools, and careful attention to technique, you can create a dough that is soft, elastic, and perfectly suited for your favorite fillings.
The key to a perfect pierogi dough recipe lies in achieving the ideal balance of texture and flavor. Whether you’re making classic potato-and-cheese pierogi, experimenting with sweet fruit fillings, or adapting the recipe to accommodate dietary needs, the principles outlined in this guide will help you master the art of pierogi-making.
Remember to take your time with each step, from kneading the dough to sealing the edges of the dumplings. Don’t hesitate to experiment and make adjustments as you gain confidence. Once you’ve perfected your pierogi dough recipe, you’ll find endless possibilities for fillings and variations to suit any occasion.
Now, it’s time to gather your ingredients, roll up your sleeves, and create a pierogi dough recipe that your family and friends will rave about. Enjoy the process, and happy cooking!

Pierogi Dough Recipe
Equipment
- Large mixing bowl
- Measuring cups and spoons
- Wooden spoon or silicone spatula
- Rolling Pin
- Knife or round cutter (for shaping pierogi)
- Clean kitchen towel (for resting the dough)
Ingredients
- 2 ½ cups 315g all-purpose flour, plus extra for dusting
- 1 large egg
- ½ cup 120ml warm water
- ¼ cup 60ml sour cream or plain yogurt (optional for softer dough)
- 2 tbsp unsalted butter melted (or vegetable oil)
- ½ tsp salt
Instructions
- Step 1: Mix the Dough
- In a large mixing bowl, combine the flour and salt.
- Make a well in the center and add the egg, sour cream (if using), and melted butter.
- Gradually pour in the warm water while mixing with a wooden spoon or spatula.
- Step 2: Knead the Dough
- Once the dough comes together, transfer it to a floured surface.
- Knead for about 8-10 minutes until the dough is smooth and elastic. If the dough is sticky, add a little flour; if too dry, add a few drops of water.
- Step 3: Rest the Dough
- Cover the dough with a clean kitchen towel or plastic wrap. Let it rest for 30 minutes at room temperature—this makes it easier to roll out.
- Step 4: Roll and Cut the Dough
- On a lightly floured surface, roll the dough out to about 1/8 inch (3mm) thickness.
- Use a round cutter (or a glass) to cut out circles, about 3 inches (7.5cm) in diameter.
- Fill each circle with your desired pierogi filling, fold in half, and press the edges firmly to seal.
- Step 5: Cook the Pierogi
- Bring a large pot of salted water to a boil.
- Drop the pierogi in small batches and cook until they float to the top, about 2-3 minutes.
- Remove with a slotted spoon and serve immediately, or pan-fry for a crispy finish.
Notes
Freezing: Freeze shaped pierogi on a baking sheet, then transfer to a freezer bag. Boil straight from frozen.
Variations: Substitute sour cream with Greek yogurt for extra richness or add a touch of vegetable oil for a vegan-friendly version.
Rolling Tip: If the dough shrinks back while rolling, let it rest a few minutes to relax the gluten.
